As a web designer, you understand the importance of having good photo content; along with the ability to position it smartly in your page designs. And, even if you’re not a professional graphic designer, your ability to edit photos just like a professional photographer would do, could prove useful as an added service you could offer your clients, and to potential clients as well.
The ability to smartly edit photo content carries with it a multitude of benefits. The same is true if you were to take some basic photography courses, or take photography up as a hobby.
-
There’s a strong relationship between photo composition and website design; think colors, light, balance, harmony, feelings, and emotions.
-
Photography and photo editing are creative crafts you could completely fall in love with.
![]()
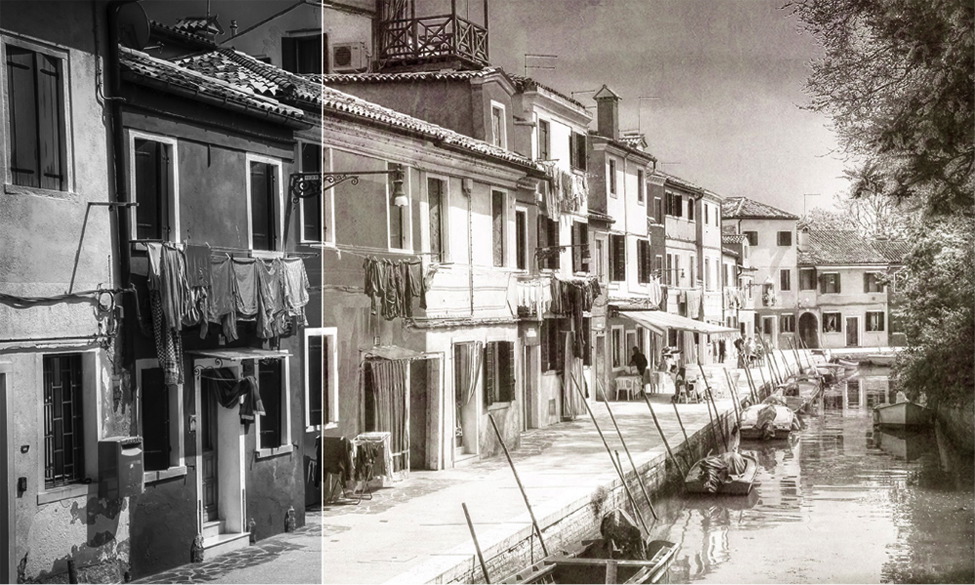
Notice the subtle effect Luminar’s texture overlay feature gives to this image.
-
Making your own photos could end your dependence on stock photos (at least for your own blog).
Luminar is the Right Tool – For Any Skill Level
Luminar’s photo editor for Mac, has become more popular with each passing year. Of the many benefits and advantages this software tool offers, the main one may be how easily it adapts to your own style and skill level; due in large part to the adaptability evident in Luminar’s workspace.
To give you an idea of what you can accomplish, here are some basic editing features that will be among the first you would learn to use:
-
The Clone Stamp tool is useful for a variety of situations. Cloning suggests a duplication of objects, but you can also remove objects, retouch skin or sky, or remove blemishes from vintage photographs. The Clone Stamp tool is easy to use, and fun to play with.
This brief tutorial explains what Clone Stamp does and how it works.
-
You can use Color Splash to create some truly dramatic effects. Starting with a color photo; convert it into B&W or grey scale. Using Color Splash, “brush†over the area where you wish to have the original color restored. The result can be spellbinding.
-
Once you’ve uploaded an image in Luminar, resizing it is simple. Clicking the command to launch the Export menu gives you an option to sharpen and/or resize your image. Several resizing modes are available, or you can set your own size. Luminar optimizes the quality of the resized photo, which you can then save for further use. Luminar supports most common digital image formats.
-
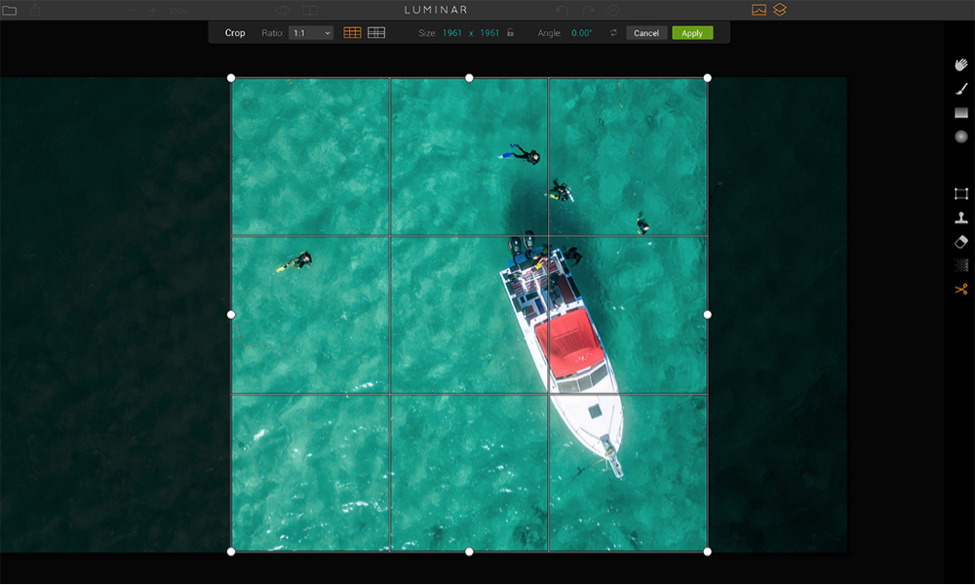
Cropping an image is typically one of the simplest editing functions to execute, and cropping an image in Luminar is no exception.
![]()
Cropping an image can easily improve it, by bringing into closer focus areas or objects of primary importance.
Luminar’s crop tools have been designed by professional photographers. Using them involves little more than clicking, picking, cropping, and applying. For some photos, square crops look best, for others, rectangular (horizontal or vertical) crops are more suitable.
Besides giving added focus to a given area or object, cropping also serves to remove elements or objects not pertinent to an image’s central theme or purpose.
Special Effects and Filters – Let’s Get Funky
There is seemingly no end to the number of different and impressive photo effects and enhancements you can create with Luminar. Sometimes, you can be having too much fun, and you’ll find yourself overdoing things, given the tons of features Luminar puts at your disposal.
One simple example: How to use Luminar’s grain effect filter.
Using Presets
For example, the “60’s Black and White†automatic preset gives an image a classic and edgy look, like you would see in a vintage film. On the other hand, the “Portrait Glamour†preset can give a photo an ethereal quality; popular in certain wedding photos.
Using Filters
Another way to give a photo a vintage effect, yet in color, would be to use the adjustable “Grain†filter to loosen the image’s contrast by lifting its black tones; and then work with temperature and tint to get the right hue. In addition to doing actual work, Luminar’s filters are a gold mine for experimenting and fun as you learn.
Working with Layers and Textures
These features take you to a new level. Use them to blend photos together, or create composite images. Texture overlays can be used to add depth and dimension.
Creating a Double Exposure

A double exposure creative photo, created using the Luminar photo editor.
Now, were getting funky! Creating a double exposure is not as difficult as it sounds. It basically involves adding a layer of a new photo to an existing one, and adjusting (pulling down in this case) the opacity. You can work with the entire scene, or just a part of it.
In Short
Easy editing could be defined as spending a few seconds, and using a minimal amount of effort, to get great results. That’s nice, especially when you’re working with more than just a few photos; or even hundreds or thousands.
How do you make that happen?
-
Use the right plugin or extension with LightRoom, Photos for Mac, or Aperture
-
Use batch processing
![]()
-
Use selective tools for selective purposes
-
Take advantage of one-click presets, one-click B&W conversion, and one-click noise elimination
Luminar, the popular editing software for Mac does it all, and more. Try it!
Comments will be moderated and
rel="nofollow"will be added to all links. You can wrap your coding with[code][/code]to make use of built-in syntax highlighter.