Recently, I have accepted a project that uses WordPress as its backend, from its design I can see I will be facing a lot of technical questions such as frontend post submission, frontend user registration and login and also different Post types, voting and a lot of forms.
Personally, I haven't involved in a full on WordPress development. I deal with it before, but just to that extend. Based on my impression, I'm alright with it because it doesn't have complicated template language, and its plugins are easy to modify. They way it's developed by using PHP and its Database are easy to understand (I'm comparing it with Joomla which always give me a major headache). I start this project with Bones WordPress Boilerplate.
My current project is near completion, absolutely happy with the result and it's fascinating that most of my technical issues were solved just by searching Google. There are vast supports and solutions for different kind of questions! You can find all sort of plugins but usually they don't do exactly what you want or it doesn't work at all. Nevertheless, I started to like WordPress even more, and I believe it can be transformed into a good CMS.
This time, we will be having a few tutorials on WordPress. A sharing of what I have learned throughout the development process. First one to look at is creating custom post type, category and tag.
Custom Post
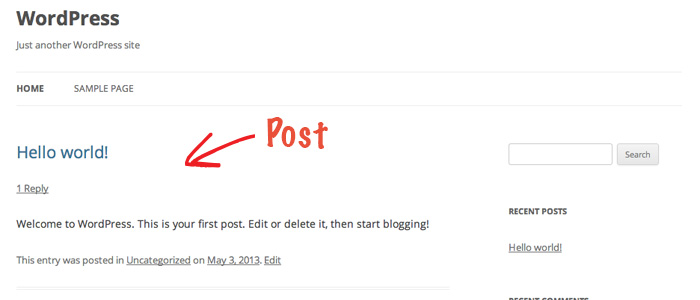
By default, WordPress comes with a default post type which is used as entries of blog posts. It's displayed in reverse sequential order by time and usually have comment fields beneath them. That will be the first thing you see in the homepage once you've installed WordPress successfully.
Good news is, you can create Custom Post Type WordPress natively by using register_post_type(). This is extremely useful in creating a new section for your website such as a post type to store portfolios, company branches, products, testimonials etc. You can achieve the same thing too if you're using Advanced Custom Fields plugin, or even better, if you used Custom Post and Advanced Custom Fields altogether.
Step 1: Add New Custom Post
We will be using WordPress twentytwelve theme in this tutorial. Open up functions.php in your twentytwelve theme folder, this is where we put all the codes. In this example, we are going to create a new custom post for Portfolio. Read more about register_post_type()
You can name the new post type, this name will be used in creating new taxanomies and files, so choose carefully otherwise it will be a pain to change it later on. In this example, we name it portfolio_type.
<?
function portfolio_custom_post() {
	// creating (registering) the custom type
	register_post_type( 'portfolio_type', /* custom post type name */
	 	// let's now add all the options for this post type
		array('labels' => array(
			'name' => 'Portfolios', /* general name for the post type, usually plural. */
			'singular_name' => 'Porfolio', /* name for one object of this post type. */
			'all_items' => 'All Porfolios', /* the all items text used in the menu. */
			'add_new' => 'Add New', /* the add new text. */
			'add_new_item' => 'Add New Porfolio', /* the add new item text */
			'edit_item' => 'Edit Post Types', /*  the edit item text */
			'new_item' => 'New Post Type', /* the new item text */
			'view_item' => 'View Post Type', /* the view item text */
			'search_items' => 'Search Post Type', /* the search items text */
			'not_found' =>  'Nothing found in the Database.', /* the not found text */
			'not_found_in_trash' => 'Nothing found in Trash', /* the not found in trash text */
			'parent_item_colon' => ''
			), /* end of arrays */
			'description' => 'Porfolio Collection Page', /* a short descriptive summary of what the post type is. */
			'public' => true,
			'publicly_queryable' => true,
			'exclude_from_search' => false,
			'show_ui' => true, /* Whether to generate a default UI for managing this post type in the admin */
			'query_var' => true,
			'menu_position' => 8, /* this is what order you want it to appear in on the left hand side menu */
			'menu_icon' => get_stylesheet_directory_uri() . '/img/custom-post-icon.png', /* the icon for the custom post type menu */
			'rewrite'	=> array( 'slug' => 'portfolio', 'with_front' => false ), /* you can specify its url slug */
			'has_archive' => 'portfolio_type', /* you can rename the slug here */
			'capability_type' => 'post',
			'hierarchical' => false,
			/* the next one is important, it tells what's enabled in the post editor */
			'supports' => array( 'title', 'editor', 'author', 'thumbnail', 'excerpt', 'trackbacks', 'custom-fields', 'comments', 'revisions', 'sticky')
	 	) /* end of options */
	); /* end of register post type */

}

// adding the function to the Wordpress init
add_action( 'init', 'portfolio_custom_post');

?>
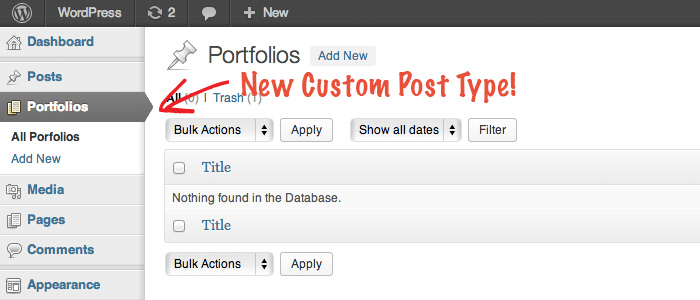
Save functions.php and refresh WordPress Admin, you should see Porfolios appear in the right hand side menu. Really simple.
Step 2: Add Category and Tag Taxonomies
Depend on your project requirement, you can add existing categories and tags to organise this newly created Portfolio Custom Post.
<?
function portfolio_custom_post() {

	register_post_type( 'portfolio_type',
		.........
		.........
		.........
	); /* end of register post type */

	/* this adds your existing post categories to custom post type */
	register_taxonomy_for_object_type('category', 'portfolio_type');

	/* this adds your existing post tags to custom post type */
	register_taxonomy_for_object_type('post_tag', 'portfolio_type');

}
?>
Otherwise, if you want to create custom categories and tags for your new custom post type, you can add code below. Read more about register_taxanomy(). Category and tag are using the same WordPress function, the main crucial difference is the hierarchical attribute. Category's value is true, Tag's value is false.
<?
//Category
register_taxonomy( 'portfolio_cat',
	array('portfolio_type'), /* use the same name you declared in custom post just now */
	array('hierarchical' => true,     /* if this is true, it acts like categories */
		'labels' => array(
			'name' => 'Portfolio Categories', /* general name for the taxonomy, usually plural.  */
			'singular_name' => 'Portfolio Category', /* name for one object of this taxonomy */
			'search_items' =>  'Search Portfolio Categories', /* the search items text */
			'all_items' => 'All Portfolio Categories', /*  the all items text */
			'parent_item' => 'Parent Portfolio Category', /* the parent item text */
			'parent_item_colon' => 'Parent Portfolio Category:', /* The same as parent_item, but with colon */
			'edit_item' => 'Edit Portfolio Category', /* the edit item text */
			'update_item' => 'Update Portfolio Category', /* the update item text */
			'add_new_item' => 'Add New Portfolio Category', /* the add new item text */
			'new_item_name' => 'New Portfolio Category Name' /* the new item name text */
		),
		'show_admin_column' => true,
		'show_ui' => true,
		'query_var' => true,
		'rewrite' => array( 'slug' => 'portfolio/category' ),
	)
);

//Tag
register_taxonomy( 'portfolio_tag',
	array('portfolio_type'), /* use the same name you declared in custom post just now *
	array('hierarchical' => false,    /* if this is false, it acts like tags */
		'labels' => array(
			'name' => 'Portfolio Tags', /* general name for the taxonomy, usually plural.  */
			'singular_name' => 'Portfolio Tag', /* name for one object of this taxonomy */
			'search_items' =>  'Search Portfolio Tags', /* the search items text */
			'all_items' => 'All Portfolio Tags', /*  the all items text */
			'parent_item' => 'Parent Portfolio Tag', /* the parent item text */
			'parent_item_colon' => 'Parent Portfolio Tag:', /* The same as parent_item, but with colon */
			'edit_item' => 'Edit Portfolio Tag', /* the edit item text */
			'update_item' => 'Update Portfolio Tag', /* the update item text */
			'add_new_item' => 'Add New Portfolio Tag', /* the add new item text */
			'new_item_name' => 'New Portfolio Tag Name' /* the new item name text */
		),
		'show_admin_column' => true,
		'show_ui' => true,
		'query_var' => true,
	)
);
?>
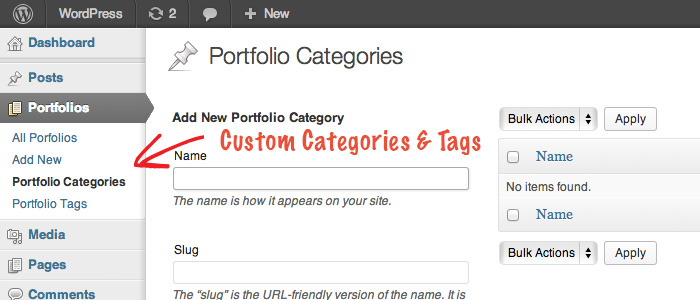
Save functions.php and refresh admin again. That's it, you should see under Porfolios, it also comes with Portfolio Categories and Portfolio Tags. Very simple right?
Getting Custom Post in Frontend
Alright, that's all you need to do to set up backend. Now, it's the frontend part.
First of all, create a Page and name it Portfolio.
Then, go to the theme folder, duplicate archive.php and single.php and rename them to archive-portfolio_type.php and single-portfolio_type.php. That's it, WordPress built-in template system will take care the rest of stuff. You can read more about it from WordPress Template Hierarchy.
Very easy isn't it? Now you have portfolio page with custom post, category and tag.
Alternatively, you can create a custom template file and using WordPress query_posts() to retrieve portfolio post.
List out all categories
<?php
$args = array(
'post_type' => 'portfolio_type',
'posts_per_page' => 10
);
query_posts($args);
if (have_posts()) {
while (have_posts()) {
the_post();
// POST DETAIL AND HTML MARKUP
}
}
next_posts_link('« Older Entries');
previous_posts_link('Newer Entries »');
?>
Conclusion
That's it. This is how to create a new section for your website content. You can make a section for testimonial, products... too many possibilities. Unfortunately, there will be no demo or download link. Hope you enjoy it and let me know if you have any questions.
Comments will be moderated and
rel="nofollow"will be added to all links. You can wrap your coding with[code][/code]to make use of built-in syntax highlighter.Because not working :(
Thanks
just a small mistake
step 2 -> create custom categories and tags -> line27: missing slash after asterisk
Other pages I create are seen (about, contact) the portfolio but no, when I create the Portfolio page I have to leave it blank?
Can you tell me where I'm wrong?